How to Create AKS Cluster
Kubernetes has come to change the world of Microservices. Azure makes Kubernetes Orchestration a breeze with their Azure Kubernetes Services. In this step by step tutorial, I show you how to create your first Kubernetes Cluster on Azure. Before we proceed, may I indulge you with a post I created a little while ago on Azure Networking?
Step 1: create an azure kubernetes service resource on azure
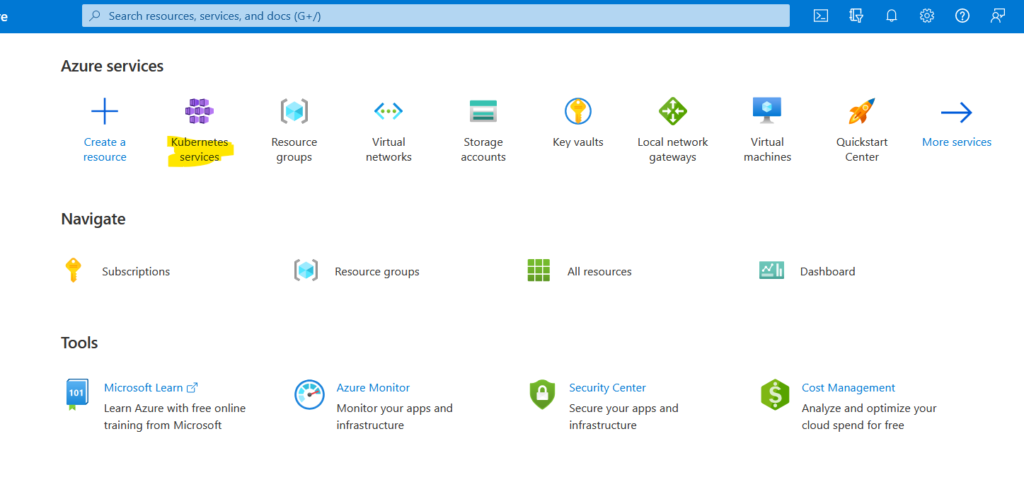
Step 2: create an azure kubernetes service cluster
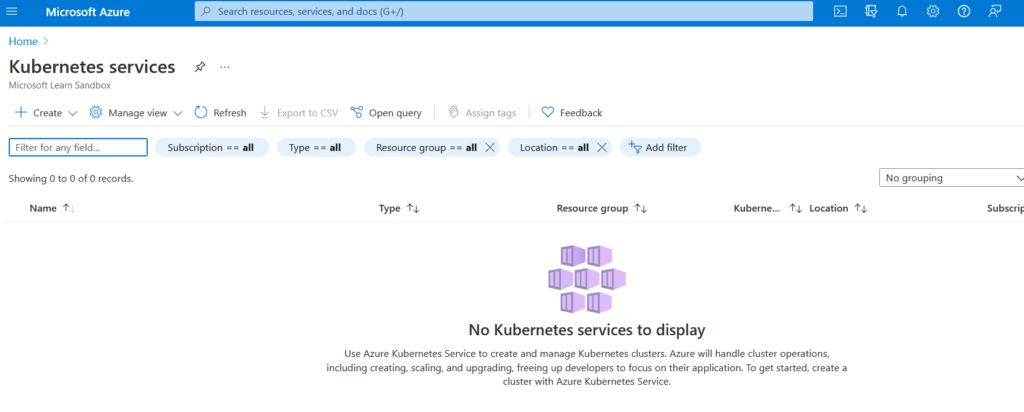
Step 3: create a kubernetes cluster
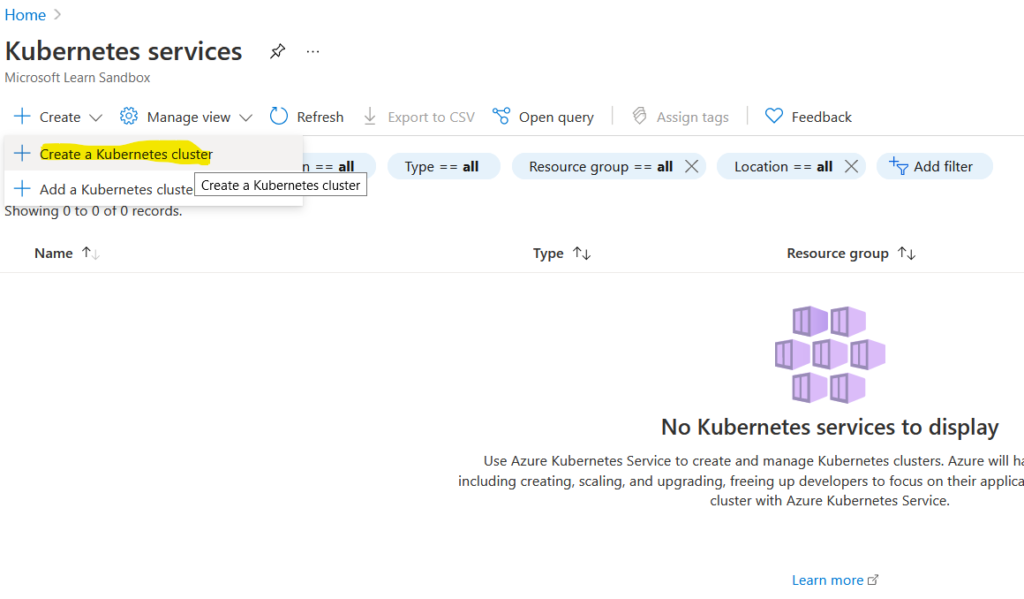
Step 3: create a kubernetes cluster specify resource group
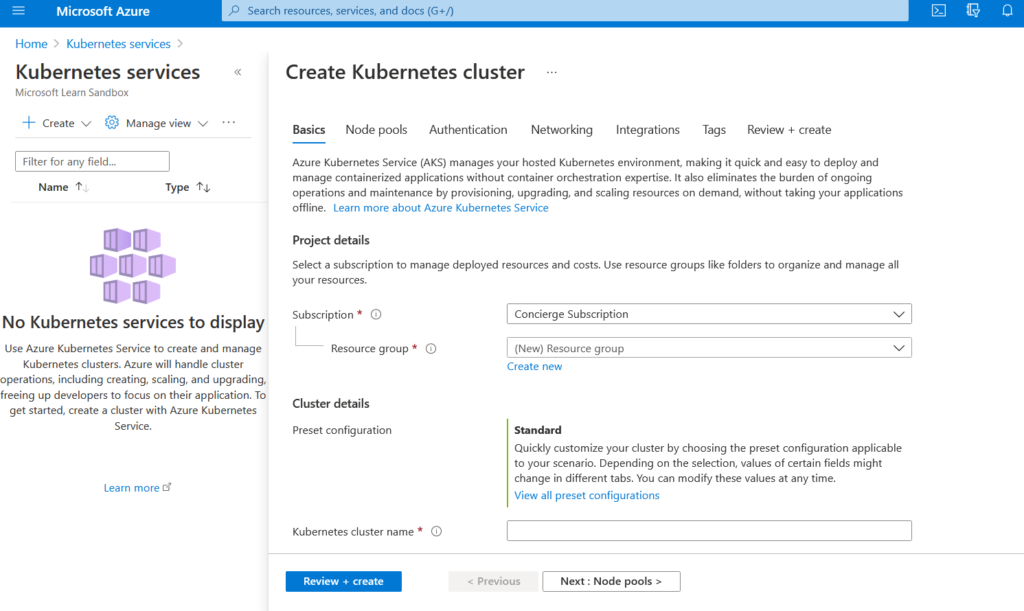
Step 4: create a kubernetes cluster name
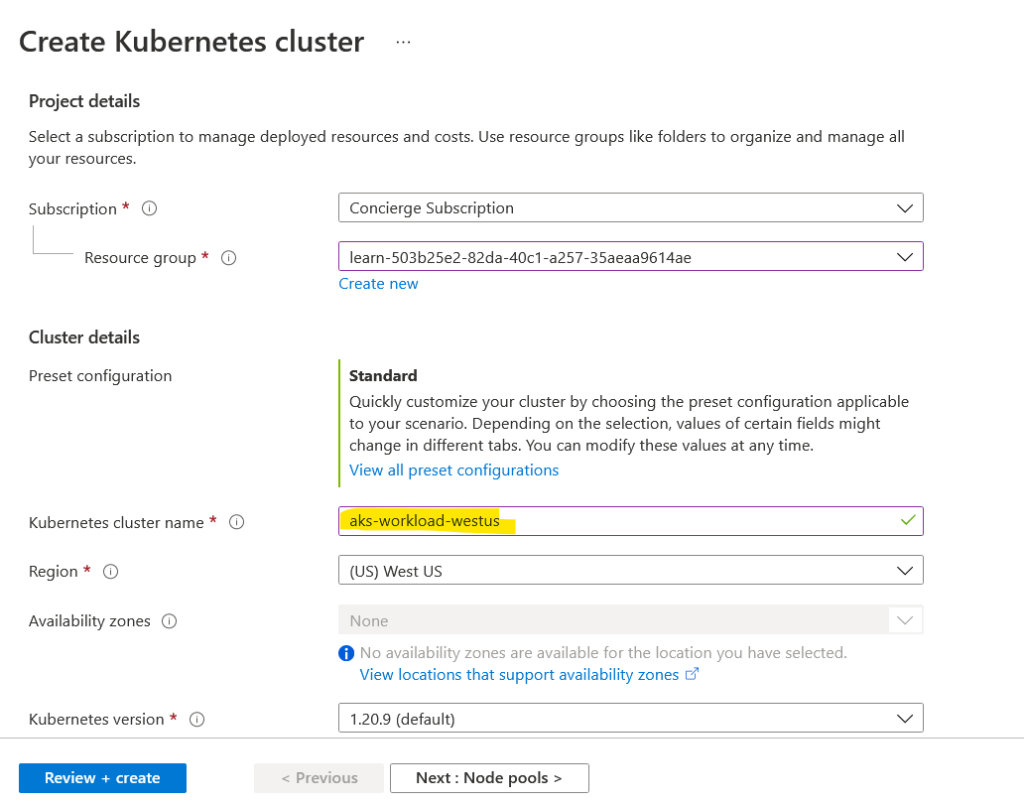
Step 5: create a kubernetes cluster kubernetes version
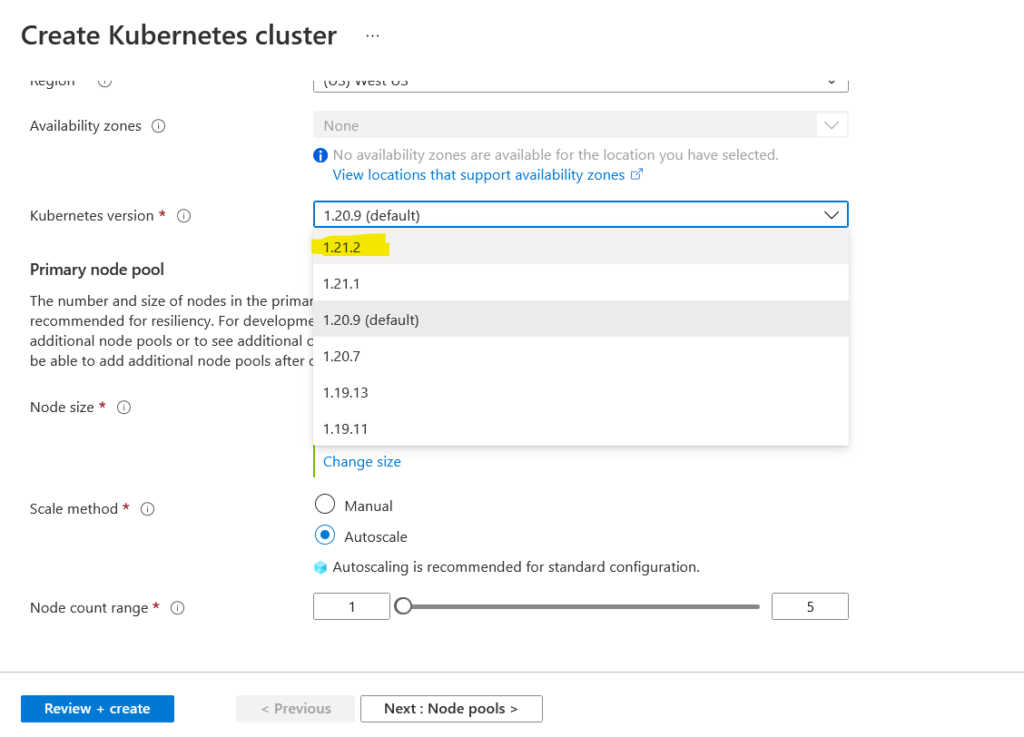
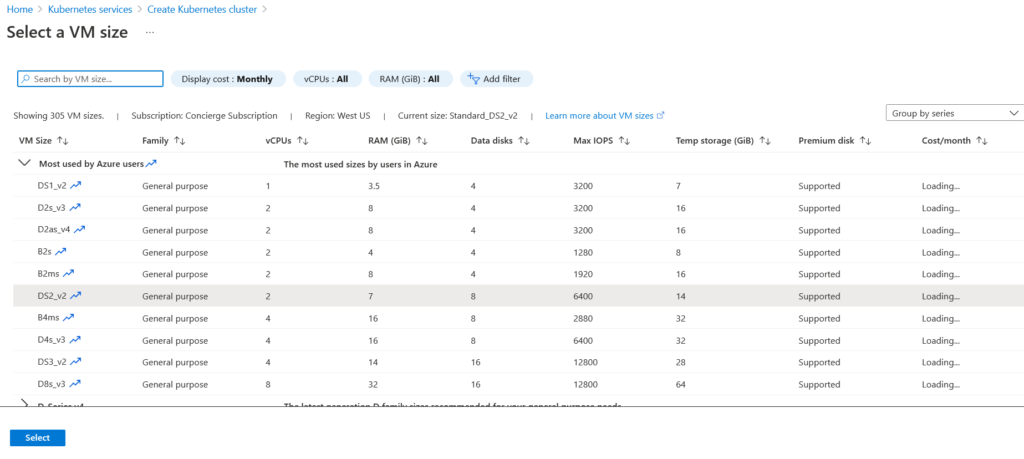
Step 6: create a kubernetes cluster choose a vm size
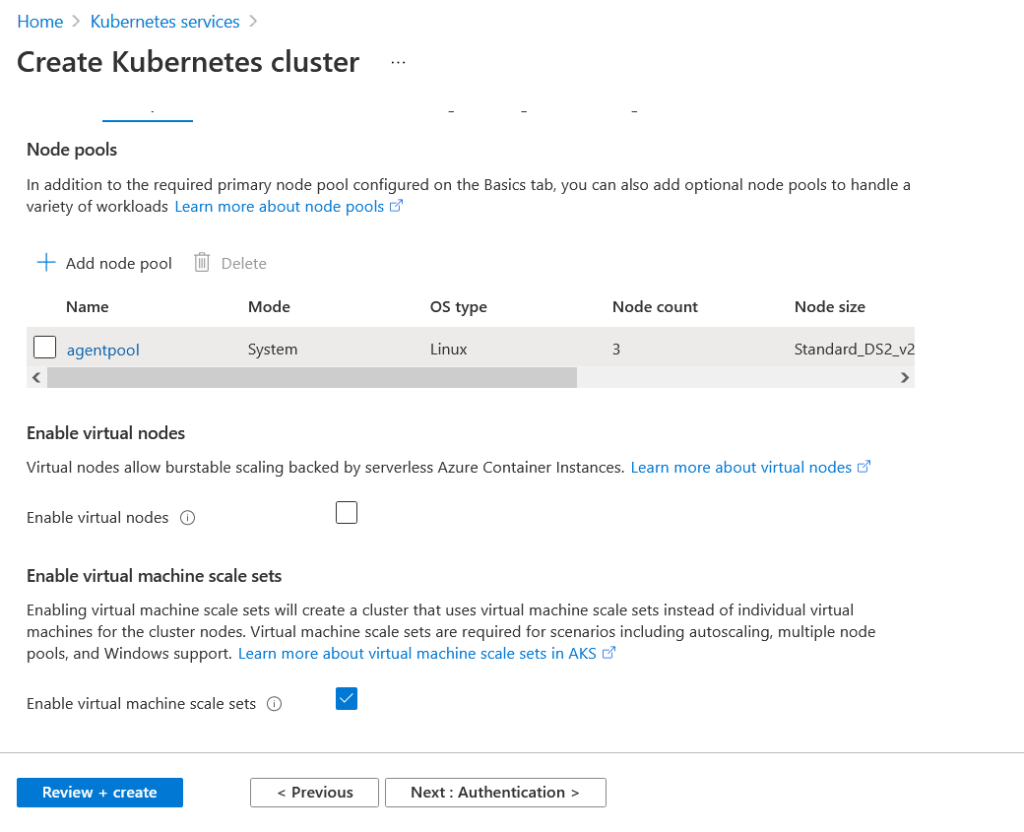
Step 7: create a kubernetes cluster enable virtual machine scale sets
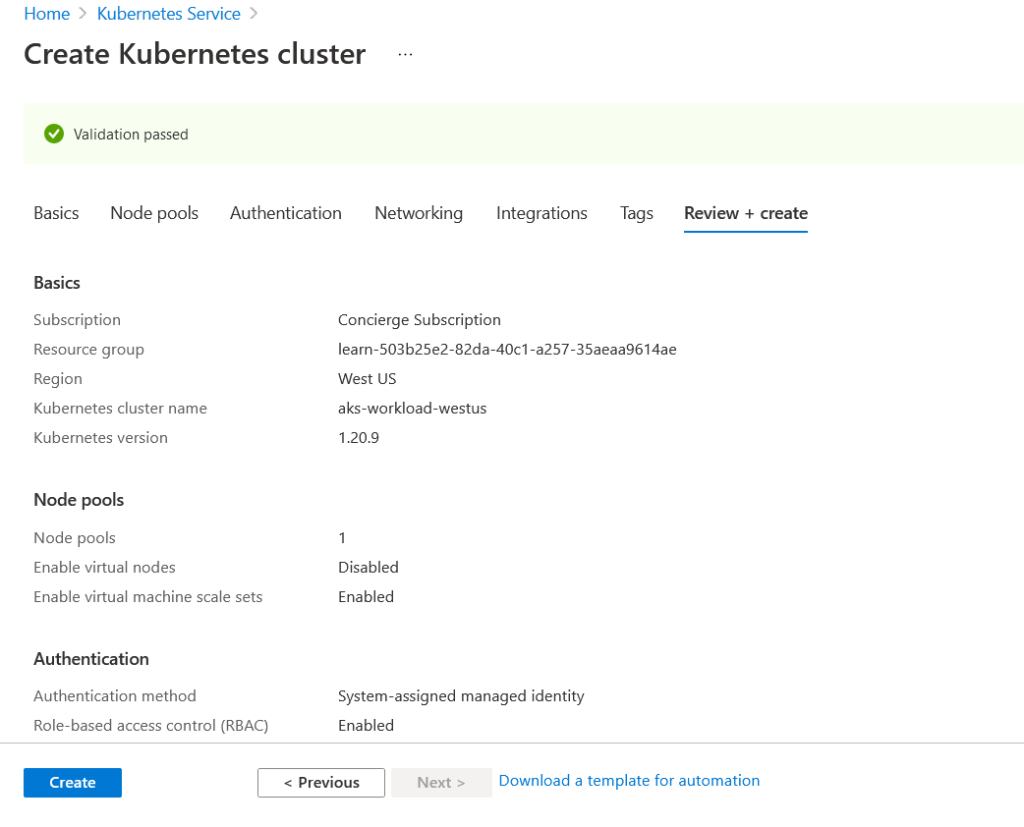
Step 8: create a kubernetes cluster – validation passed
Step 9: create a kubernetes cluster – deployment
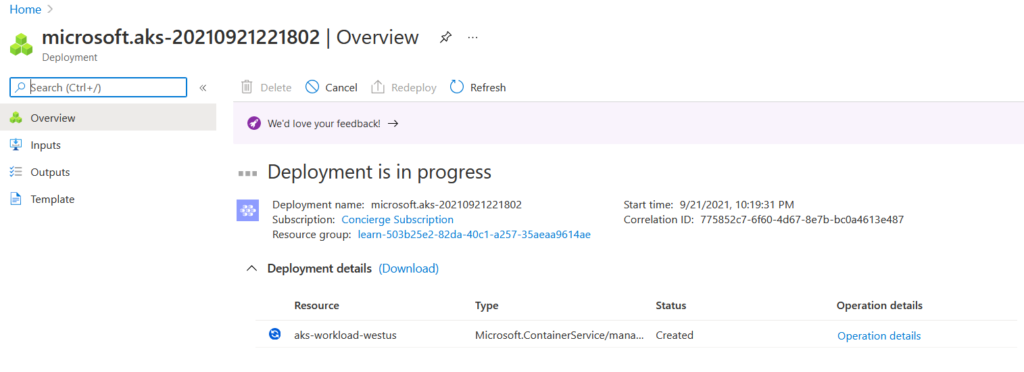
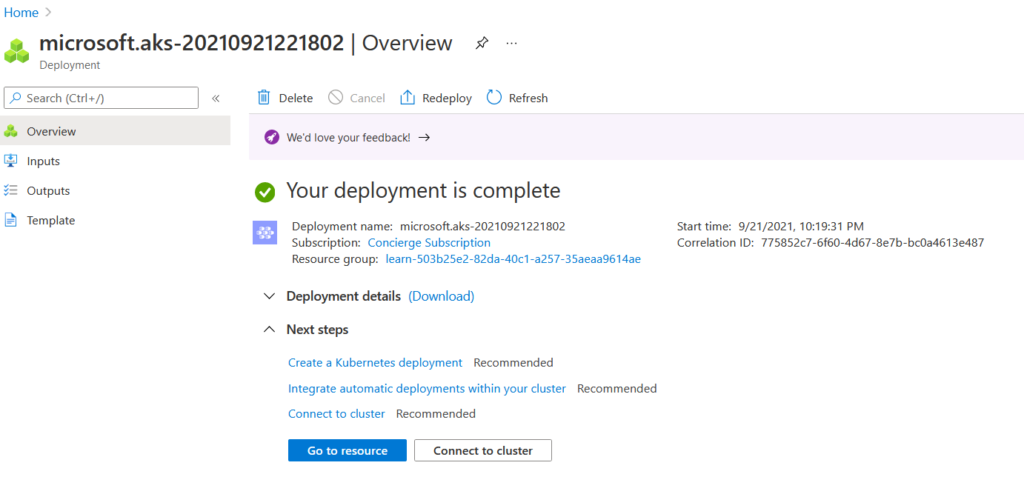
Step 10: create a kubernetes cluster – deployment complete
How to Create AKS Cluster – Working via the Shell
Connect to your cluster using command line tooling to interact directly with cluster using kubectl, the command line tool for Kubernetes. Kubectl is available within the Azure Cloud Shell by default and can also be installed locally
az account set --subscription 938f58d6-a922-40d0-b7b2-7068c5392eaf
az aks get-credentials --resource-group learn-503b25e2-82da-40c1-a257-35aeaa9614ae --name aks-workload-westus# List all deployments in all namespaces
kubectl get deployments --all-namespaces=true
# List all deployments in a specific namespace
# Format :kubectl get deployments –namespace
kubectl get deployments --namespace kube-system
# List details about a specific deployment
# Format :kubectl describe deployment
kubectl describe deployment my-dep --namespace kube-system
# List pods using a specific label
# Format :kubectl get pods -l
kubectl get pods -l app=nginx --all-namespaces=true
# Get logs for all pods with a specific label
# Format :kubectl logs -l
kubectl logs -l app=nginx --namespace kube-system
With your AKS Cluster now deployed, kubernetes commands can now be issued.
azure_portal@Azure:~$ kubectl get pods -n kube-system
NAME                                  READY   STATUS    RESTARTS   AGE
azure-ip-masq-agent-cfz8r             1/1     Running   0          53m
coredns-autoscaler-54d55c8b75-d7xjm   1/1     Running   0          54m
coredns-d4866bcb7-4wzr8               1/1     Running   0          54m
coredns-d4866bcb7-n4jf8               1/1     Running   0          53m
kube-proxy-5xpvw                      1/1     Running   0          53m
metrics-server-569f6547dd-k5l97       1/1     Running   0          54m
tunnelfront-9bfd7cd94-9hh2c           1/1     Running   0          54m
azure_portal@Azure:~$
azure_portal@Azure:~$ kubectl get nodes
NAME                                STATUS   ROLES   AGE   VERSION
aks-agentpool-29375834-vmss000001   Ready    agent   55m   v1.20.9
azure_portal@Azure:~$ kubectl get all
NAME                 TYPE        CLUSTER-IP   EXTERNAL-IP   PORT(S)   AGE
service/kubernetes   ClusterIP   10.0.0.1             443/TCP   57m
azure_portal@Azure:~$ kubectl get deployments -n kube-system
NAME                 READY   UP-TO-DATE   AVAILABLE   AGE
coredns              2/2     2            2           57m
coredns-autoscaler   1/1     1            1           57m
metrics-server       1/1     1            1           57m
tunnelfront          1/1     1            1           57m
azure_portal@Azure:~$
azure_portal@Azure:~$ kubectl get rs  -n kube-system
NAME                            DESIRED   CURRENT   READY   AGE
coredns-autoscaler-54d55c8b75   1         1         1       58m
coredns-d4866bcb7               2         2         2       58m
metrics-server-569f6547dd       1         1         1       58m
tunnelfront-9bfd7cd94           1         1         1       58m
azure_portal@Azure:~$ kubectl get cm  -n kube-system
NAME                                 DATA   AGE
azure-ip-masq-agent-config           1      59m
cluster-autoscaler-status            1      59m
coredns                              1      59m
coredns-autoscaler                   1      58m
coredns-custom                       0      59m
extension-apiserver-authentication   6      59m
kube-root-ca.crt                     1      59m
overlay-upgrade-data                 4      59m
tunnelfront-kubecfg                  1      59m
azure_portal@Azure:~$
Follow Microsoft’s Lab on creating Azure Kubernetes Services here.
