In my previous article, I explained how to connect an IoT Device to Azure IoT Hub
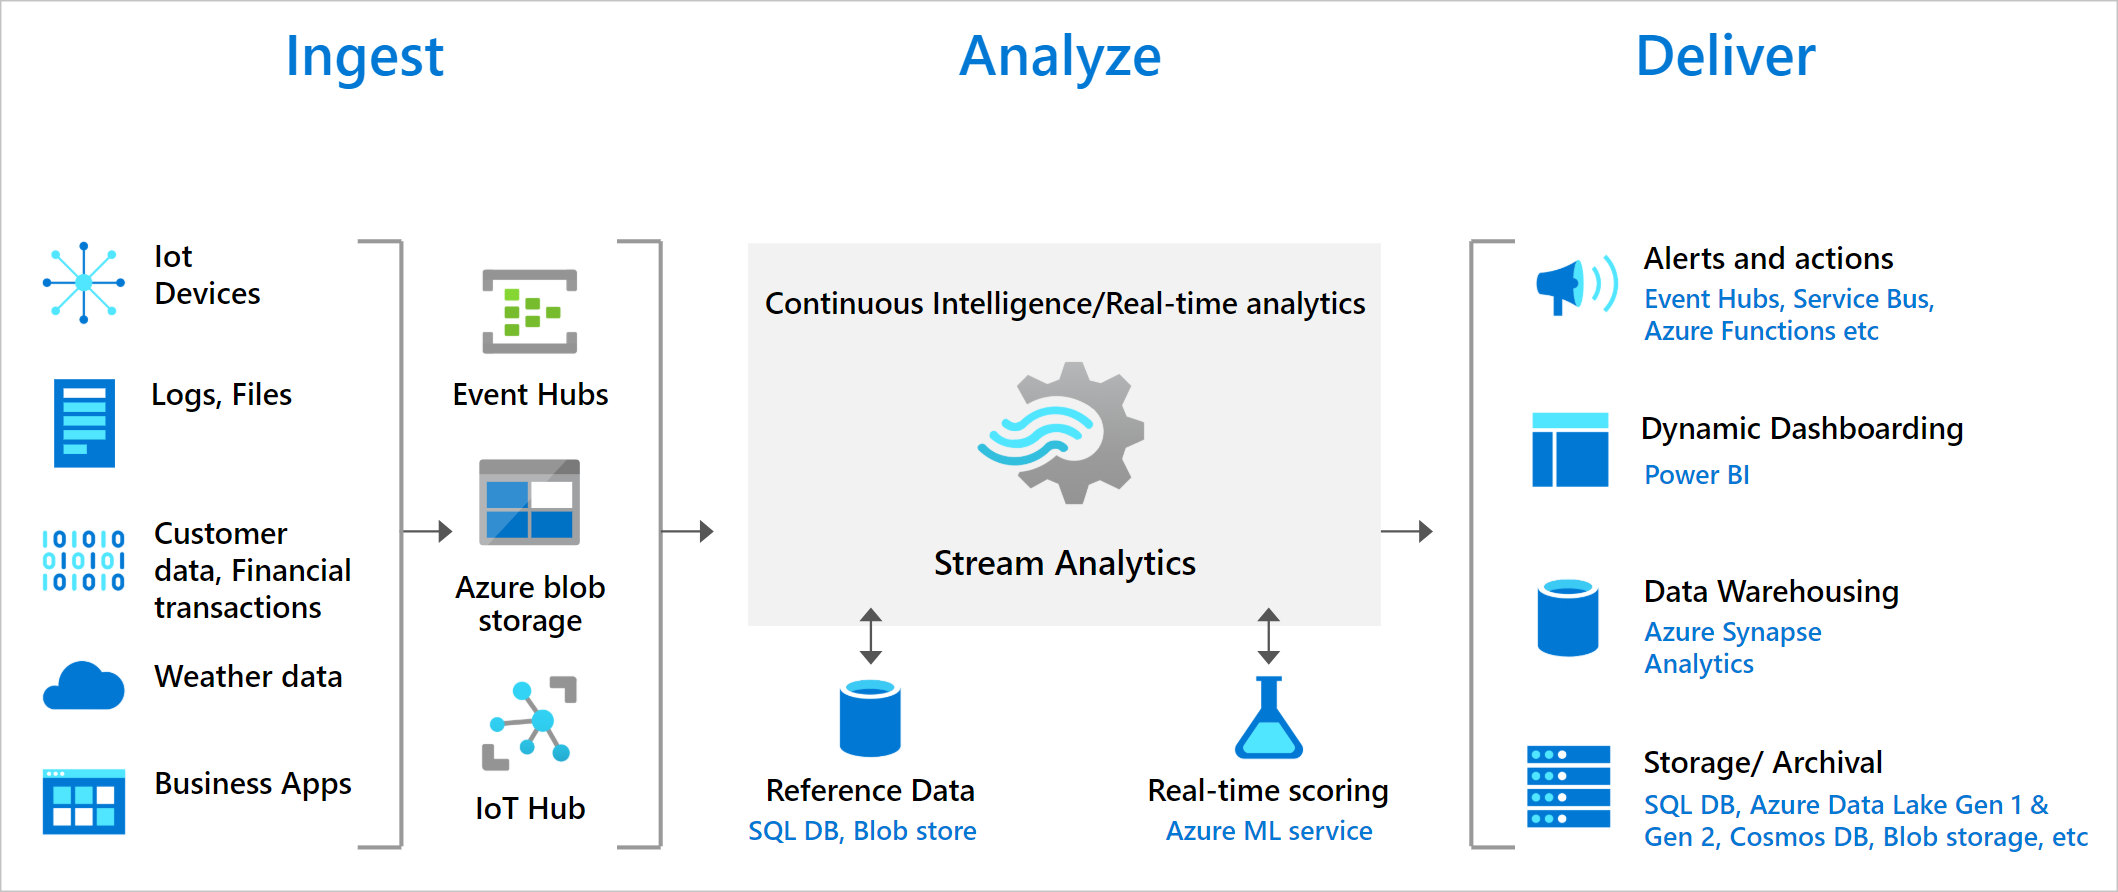
In this article of Ingesting and Processing Streaming and IoT Data for Real-Time Analytics, we are going to explore how to get your IoT events captured in a data stream into a database of your choosing. Processing real-time IoT data streams with Azure Stream Analytics is a thing of beauty.
Scenario
Softclap Technologies, which is a company in the vehicle tracking and automation space, has completely automated its vehicle tracking processes. Their vehicles are equipped with sensors that are capable of emitting streams of data in real time. In this scenario, a Data Analyst Engineer wants to have real-time insights from the sensor data to look for patterns and take actions on them. You can use Stream Analytics Query Language (SAQL) over the sensor data to find interesting patterns from the incoming stream of data.
Let us look at the pre-requisites;
You can find that setup in a recent post connect an IoT Device to Azure IoT Hub.
With the above requirements in place, go ahead to follow the remainder steps to get Azure Stream Analytics to stream your IoT events to your choice Database.
What we are building today;
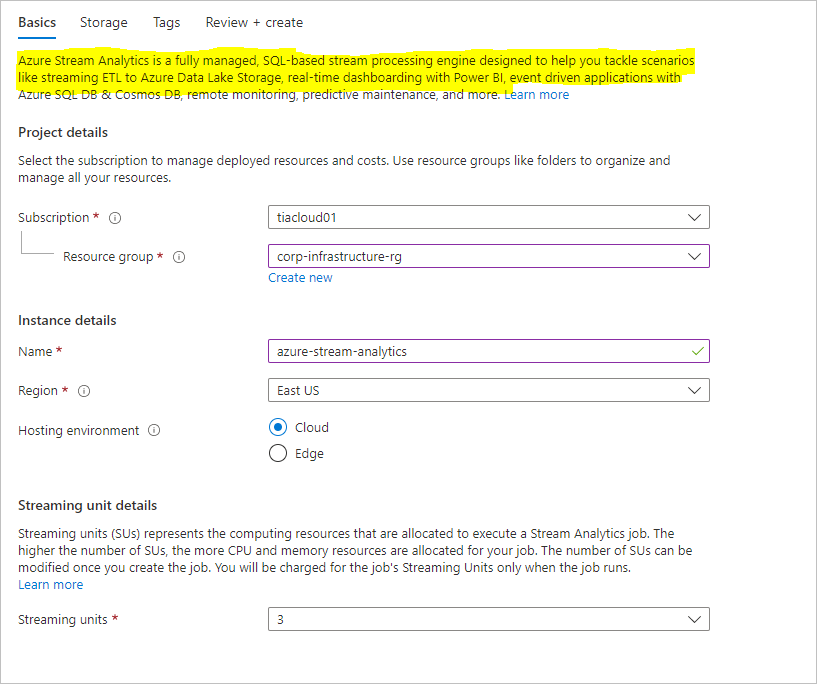
Step 1: Create Stream Analytics
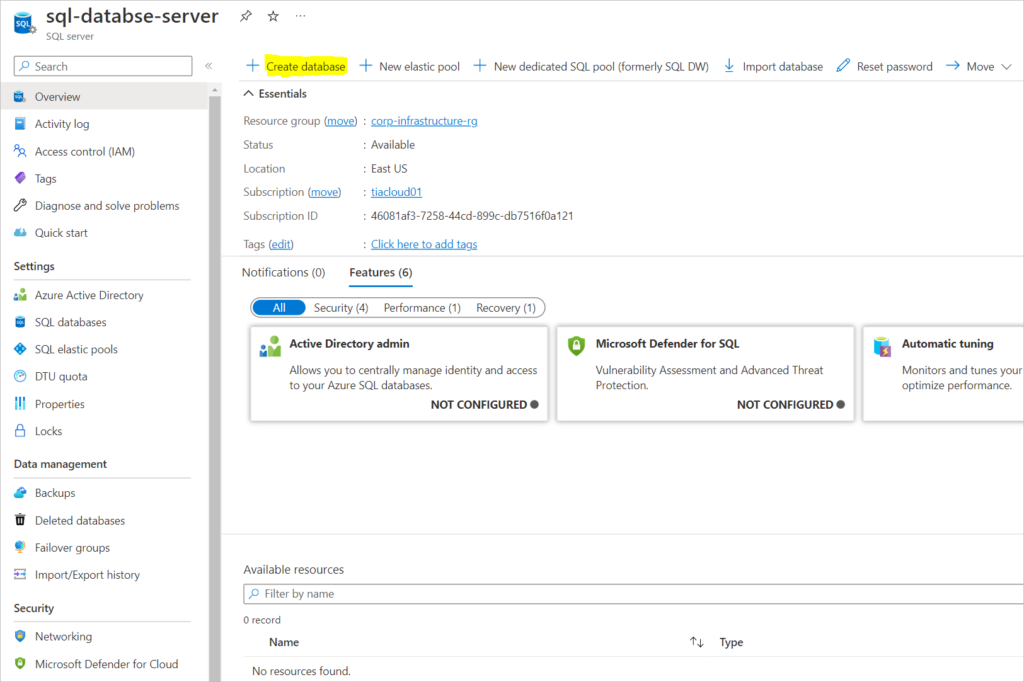
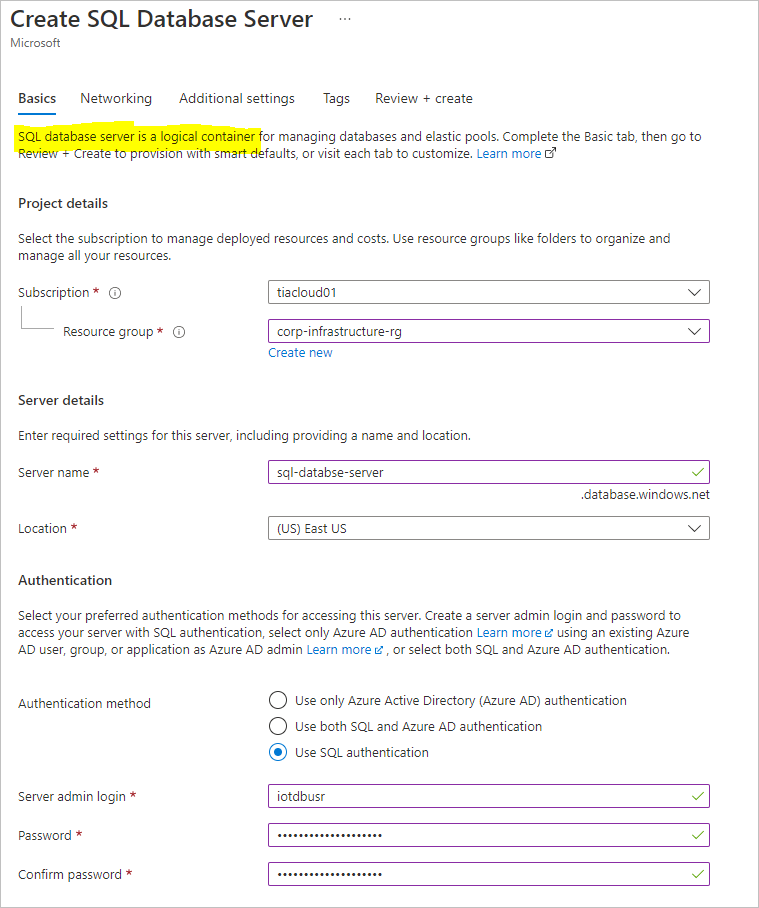
Step 2: Create SQL Database Server
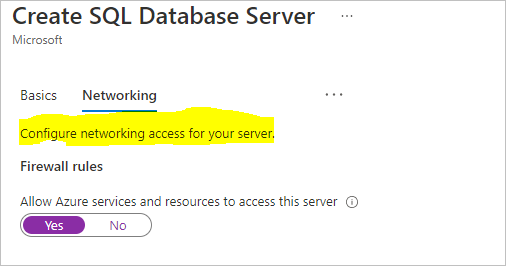
Step 3: Configure Networking to Allow Azure services and resources to access this SQL Database Server
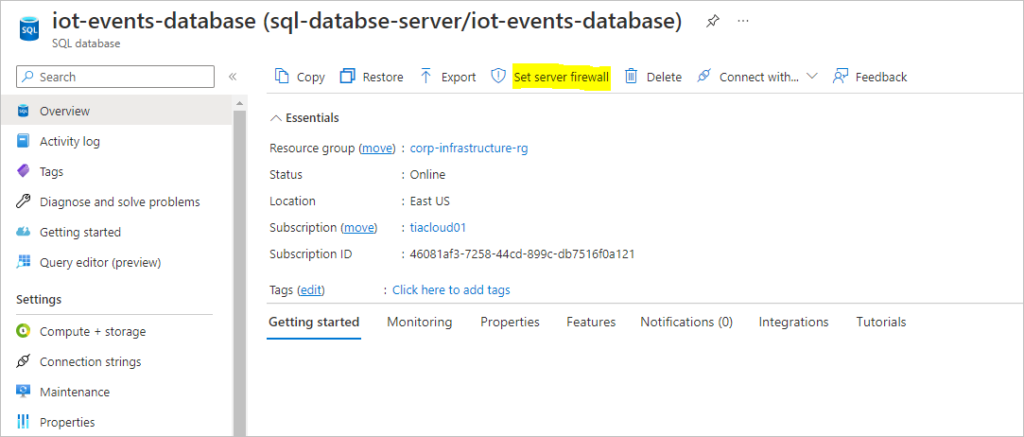
Step 5: Create Firewall Rules – this helps you access the Database
Step 6: Create Azure Stream Analytics to allow you to perform near real-time analytics on streaming data. Create a job right from your database.
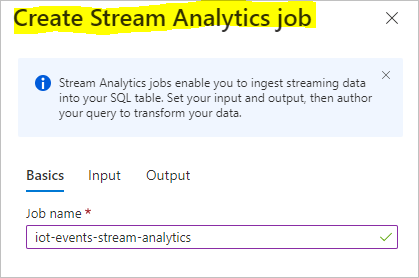
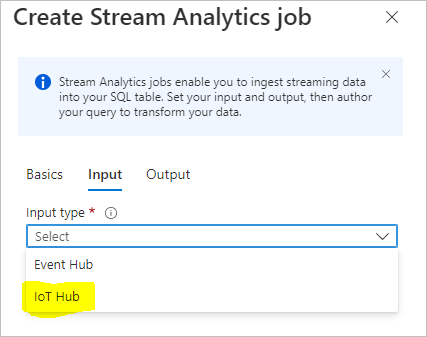
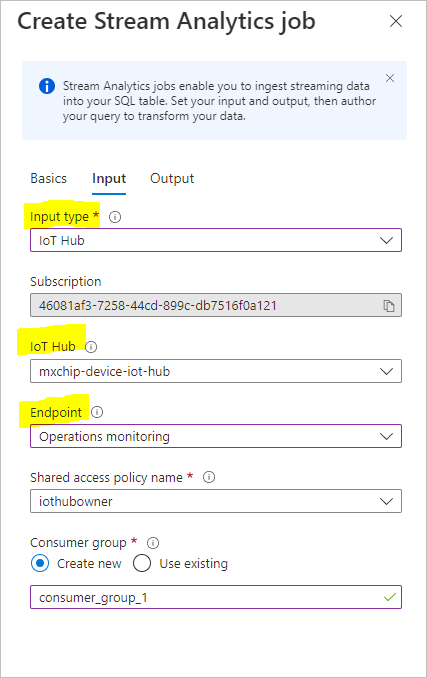
Step 7: Select IoT Hub as Input
Stream Analytics jobs enable you Ingest streaming data into your SQL table. Set your input and output, then author your query to transform your data.
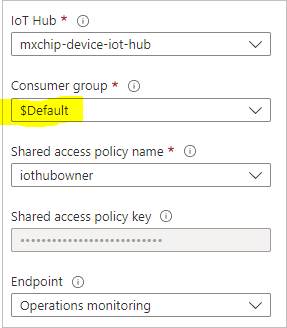
You can create a new consumer group but in this setup, I have had to use the existing consumer group $Default.
IoT Hubs limit the number of readers within one consumer group (to 5). We recommend using a separate group for each job. Leaving this field empty will use the ‘$Default’ consumer group.
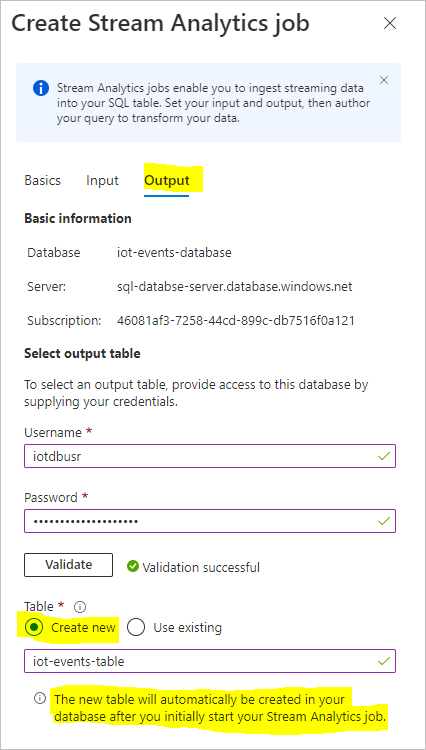
Step 8: Select Output
Since you are streaming the telemetry data to your database, select the credentials used for the output table where you can query your data from later on.
The new table will automatically be created in your database after you initially start your Stream Analytics job
Now you have completed the configuration for Input and Output from the IoT Hub Telemetry to the Database Table.
Step 9: Telemetry Stream Shows Sample Events from the IoT Device
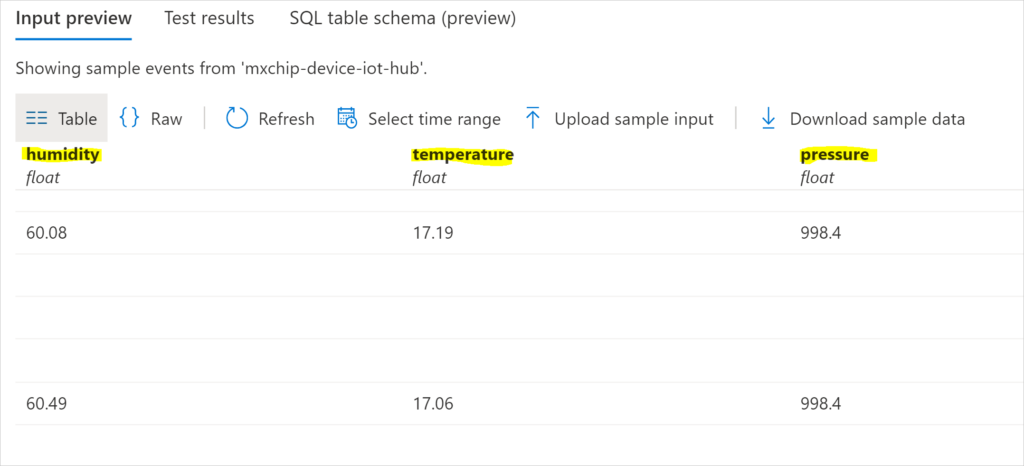
Step 10: Click Test Query
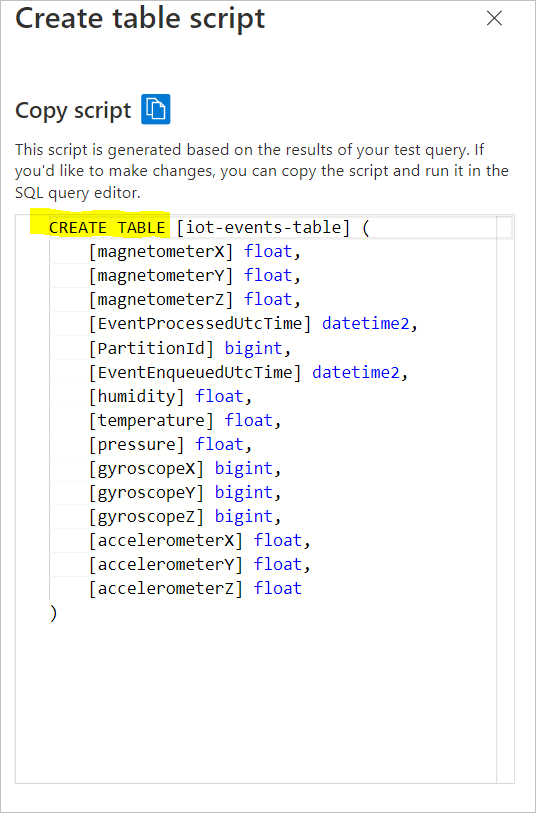
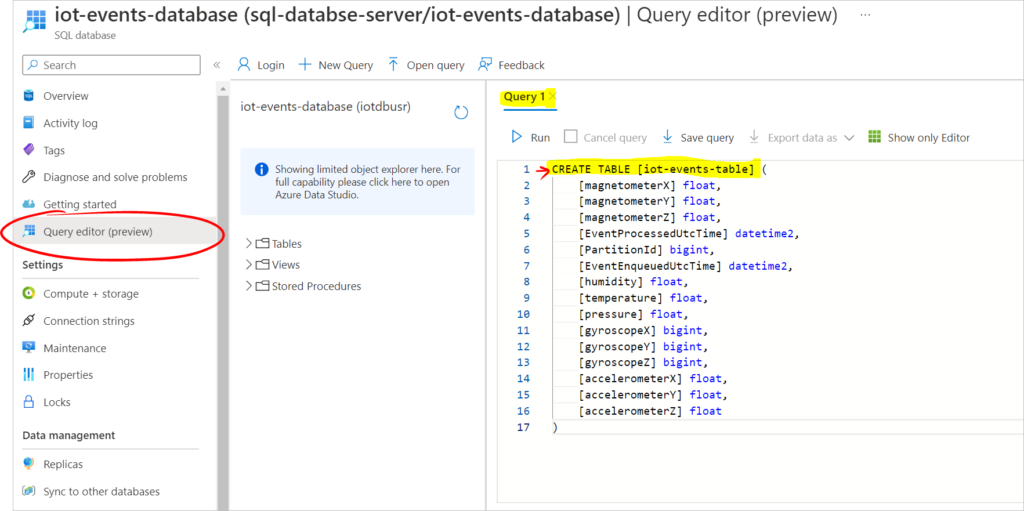
Since the objective is really to record the events in our database table, there is a need to create a table matching the schema of your test query results.
PS: Using the click to create table has not worked well for me in the past. The fields were completely out of sync. I will therefore select view create table SQL script and then connect to the database locally or from Azure Query Editor to create the tables. Let’s dive in.
Step 11: Open SQL Database Query Editor
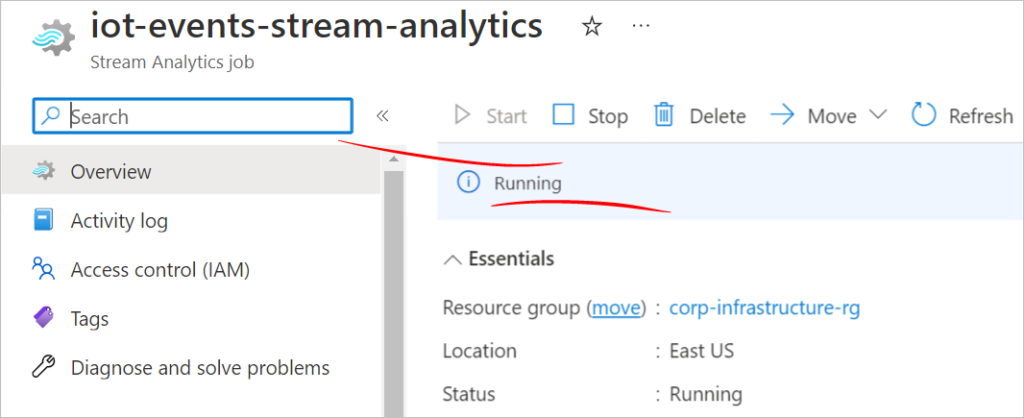
Now that this step has completed successfully, head back to Stream Analytics and click on Start Stream Analytics Job. Starting the stream analytics job ensured that the input iot device telemetry is captured in the database predefined table which can be queried later on.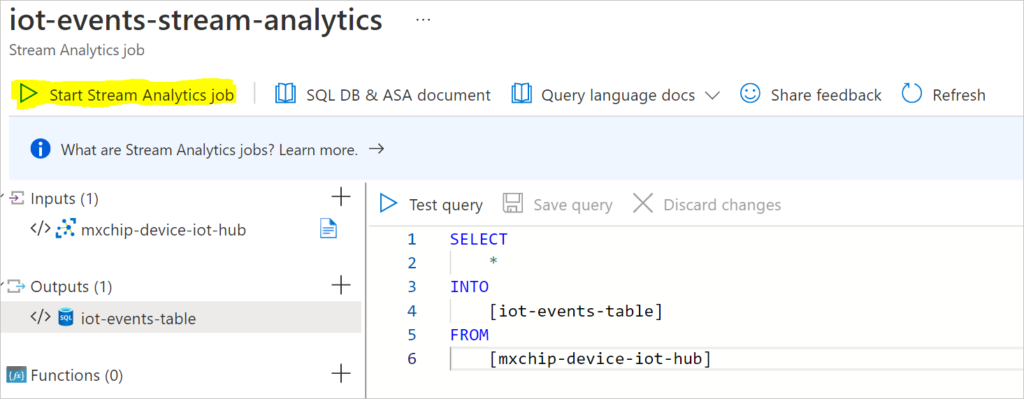
Authenticate to Database SQL Server where Output Table is stored.
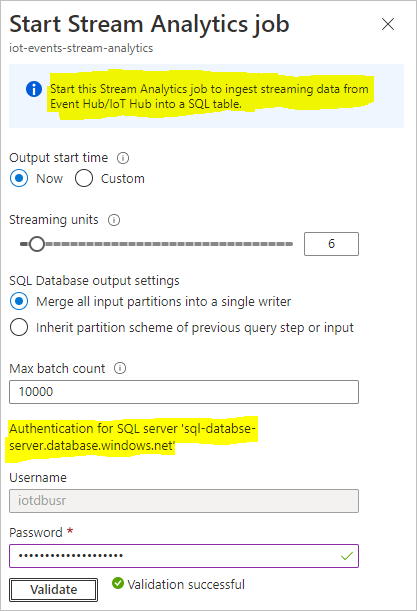
Step 12: Click Start to begin writing stream data into Database table.
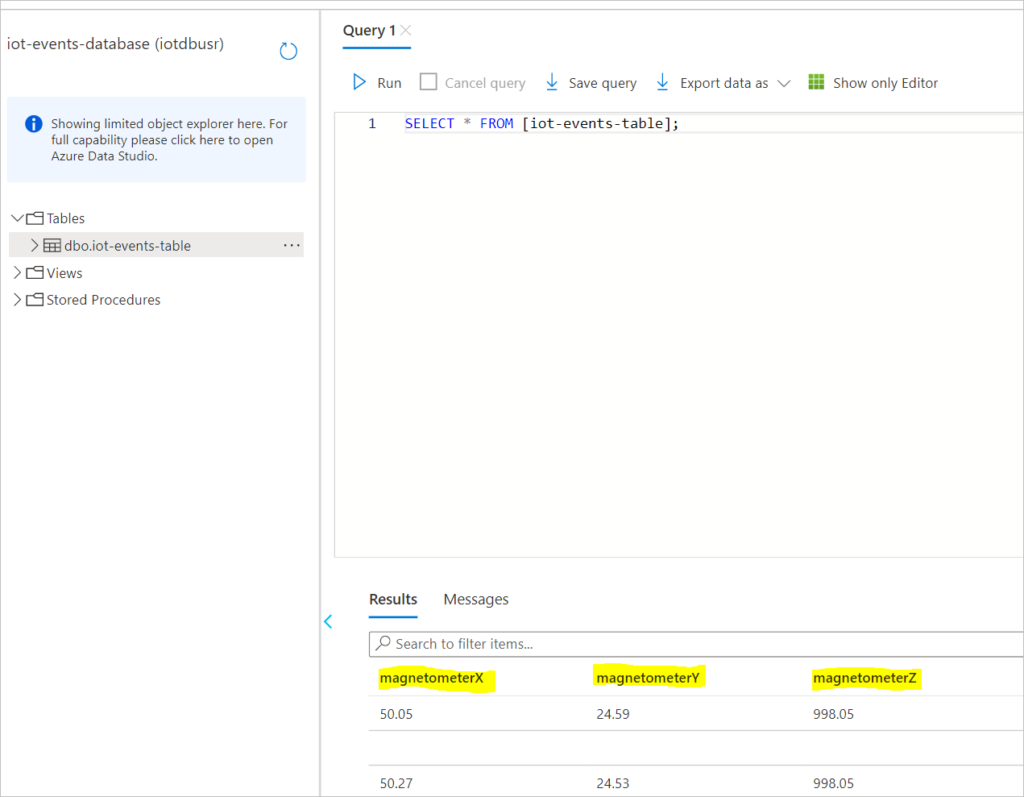
Back to the Query Editor and below are the results.
And so there we have it, a successful stream of IoT events from a remote IoT device sending live telemetry ingested in our stream analytics and captured in our database table.
Click here to learn more about other ways of ingesting data in Azure Stream Analytics.
