Understanding Azure Networking Step by Step is an essential skill for all Network Engineers who would be supporting companies to migrate to the new era of cloud computing.
Azure Cloud Services has taken a turn for the best with so many enterprise companies currently hosting critical services on the Microsoft Cloud Platform. Microsoft has made great strides in Cloud computing and no wonder readers are requesting to have understanding of technical aspects to this all loved platform. Networking is a very essential foundation for every aspect of communication on the internet between devices and resources. So today, let’s discuss what is required to understanding azure networking step by step.
So How Does One Create Azure Virtual Networks?
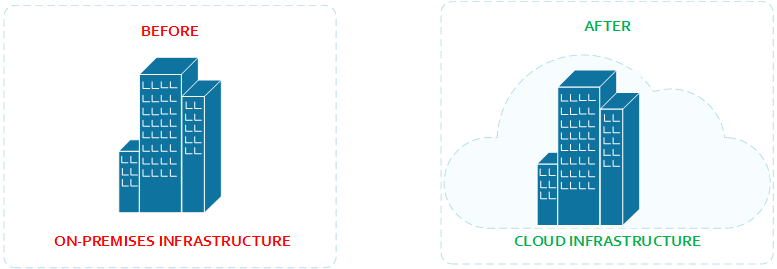
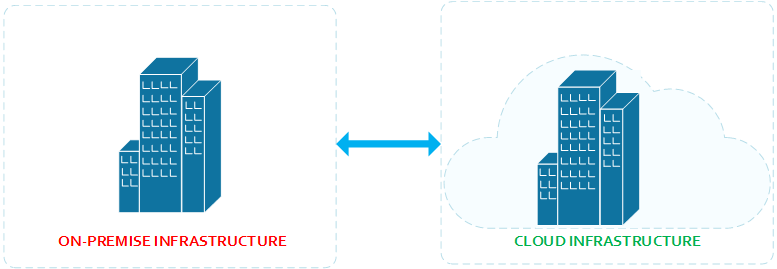
To begin the article on Understanding Azure Networking Step by Step, understand that an Azure virtual network (VNet) is a representation of your own network in the cloud. This means that the cloud is a platform or data-centre remote from your on-prem location which represents your resources and corporate network or infrastructure space in the cloud. Sometimes these cloud infrastructure could be geographically remote from your current location or perhaps quite close to your region. The Microsoft Azure Cloud Platform has been really engineered for every aspect of business. Take a look at this visual representation in Figure 1.1
Figure 1.1 – Understanding Azure Networking Step by Step – Cloud Infrastructure Presence
You can control your Azure network settings and define DHCP address blocks, DNS settings, security policies, and routing. You can also further segment your VNet into subnets and deploy Azure IaaS virtual machines (VMs) and PaaS role instances, in the same way you can deploy physical and virtual machines to your on-premises datacenter. In essence, you can expand your network to Azure, bringing your own IP address blocks.
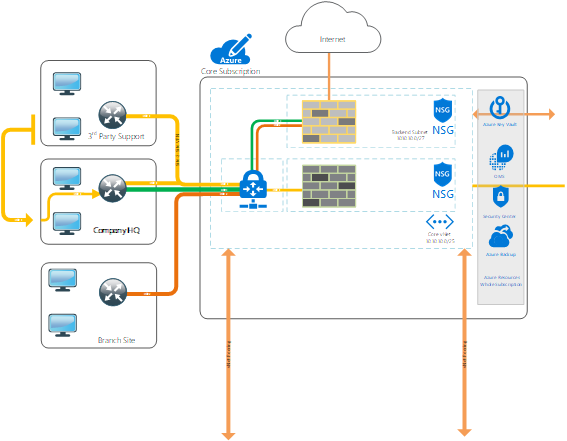
It is a logical isolation of the Azure cloud dedicated to your subscription. You can use VNets to provision and manage virtual private networks (VPNs) in Azure and, optionally, link the VNets with other VNets in Azure, or with your on-premises IT infrastructure to create hybrid or cross-premises solutions. Each VNet you create has its own CIDR block, and can be linked to other VNets and on-premises networks as long as the CIDR blocks do not overlap. You also have control of DNS server settings for VNets, and segmentation of the VNet into subnets. Depending on your business needs, you may need to keep some systems on Premises and others in the Cloud. As a common practice, many companies introduce their Test/Dev and DR systems to the Cloud Platform and as their confidence increases in the hybrid solution, many other systems naturally get migrated to the Cloud. Figure 1.2 depicts visually what a hybrid solution looks like.
Figure 1.2 – Understanding Azure Networking Step by Step – Azure Hybrid Architecture
 With regards to this architecture, there are azure connectivity options Microsoft has made available to get your on-premises connect to azure. See the possible connection options to the azure cloud platform in Figure 1.3
What protocols can I use within VNets?
You can use TCP, UDP, and ICMP TCP/IP protocols within VNets. Unicast is supported within VNets, with the exception of Dynamic Host Configuration Protocol (DHCP) via Unicast (source port UDP/68 / destination port UDP/67). Multicast, broadcast, IP-in-IP encapsulated packets, and Generic Routing Encapsulation (GRE) packets are blocked within VNets.
Figure 1.3 – Understanding Azure Networking Step by Step – Azure Connection Options
This is what Microsoft says about their supported connectivity options to Azure.
Virtual Network Point-to-site
A point-to-site VPN also allows you to create a secure connection from your Windows-based computer to your virtual network without having to deploy any special software. We provide you with VPN policies that you can download into your computer and use Windows’ built in VPN client. You can securely connect to the virtual network just the way you use VPN clients to connect to your company’s corporate network. Since we use standard Secure Sockets Tunneling Protocol (SSTP), you will be able to securely connect to Azure from anywhere. This capability enables you to quickly setup connectivity to Azure for prototyping, development, testing and simulation purposes. You can use the same setup and configuration to work with some site-to-site connectivity options.
Virtual Network Site-to-site
A site-to-site VPN allows you to create a secure connection between your on-premises site and your virtual network. We use industry standard IPsec VPN in Azure. So we are interoperable with most VPN devices. You can refer to a list of known compatible devices and sample configurations in the Azure website. You can use this service to connect up to 10 on-premises sites and virtual networks to each other securely. Once a site-to-site VPN is setup you have IP level connectivity between your premises and virtual networks in Azure. This enables you to build truly hybrid applications in Azure. Use this service in cases where your cross-premises connectivity throughput is nominal (~ 100 Mbps).
ExpressRoute
ExpressRoute lets you create private connections between Azure datacenters and infrastructure that’s on your premises or in a co-location environment. ExpressRoute connections do not go over the public Internet, and offer more reliability, faster speeds, lower latencies and higher security than typical connections over the Internet. With ExpressRoute, you can establish connections to Azure at an ExpressRoute location (Exchange Provider facility) or directly connect to Azure from your existing WAN network (such as a MPLS VPN) provided by a network service provider. You can learn more about ExpressRoute from my previous blog post. I have attempted to put together a small table to summarize the capabilities, features and use cases for each of these services.
Understanding Azure Networking Step by Step – Introduction to Virtual Networks | vNets Configuring
Some house keeping before creating your first virtual network on Azure.
Use VNets to:
- Create a dedicated private cloud-only VNet Sometimes you don’t require a cross-premises configuration for your solution. When you create a VNet, your services and VMs within your VNet can communicate directly and securely with each other in the cloud. You can still configure endpoint connections for the VMs and services that require Internet communication, as part of your solution.
- Securely extend your data center With VNets, you can build traditional site-to-site (S2S) VPNs to securely scale your datacenter capacity. S2S VPNs use IPSEC to provide a secure connection between your corporate VPN gateway and Azure.
- Enable hybrid cloud scenarios VNets give you the flexibility to support a range of hybrid cloud scenarios. You can securely connect cloud-based applications to any type of on-premises system such as mainframes and Unix systems.
What address ranges can I use in my VNets?
Private Address Space RFC 1918

   The Internet Assigned Numbers Authority (IANA) has reserved the
   following three blocks of the IP address space for private internets:

     10.0.0.0        -   10.255.255.255  (10/8 prefix)
     172.16.0.0      -   172.31.255.255  (172.16/12 prefix)
     192.168.0.0     -   192.168.255.255 (192.168/16 prefix)
Is there a limit to the number of subnets in my VNet?
How to Create Azure Vnets
- From a browser, navigate to http://portal.azure.com and, if necessary, sign in with your Azure account.
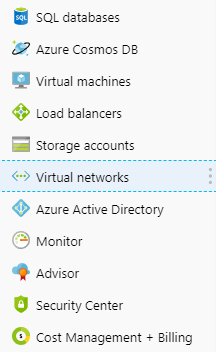
- Click on Virtual Networks from the side pane.
To Create Azure Vnets in PowerShell, Microsoft has a great deal of information at this resource: Create a virtual network using PowerShell
Follow these steps if you are only interested in creating vnets with PowerShell
Create the resource group
Before you can create a virtual network, you have to create a resource group to host the virtual network. Create a resource group with New-AzResourceGroup. This example creates a resource group named encResourceGroup in the UKWEST location:
New-AzResourceGroup -Name encResourceGroup -Location UKWEST
Create the virtual network
Create a virtual network with New-AzVirtualNetwork. This example creates a default virtual network named encVirtualNetwork in the UKWEST location:
$virtualNetwork = New-AzVirtualNetwork `
  -ResourceGroupName encResourceGroup `
  -Location UKWEST `
  -Name encVirtualNetwork `
  -AddressPrefix 10.10.10.0/16
Add a subnet
Azure deploys resources to a subnet within a virtual network, so you need to create a subnet. Create a subnet configuration named default with Add-AzVirtualNetworkSubnetConfig:
$subnetConfig = Add-AzVirtualNetworkSubnetConfig `
  -Name default `
  -AddressPrefix 10.10.10.0/24 `
  -VirtualNetwork $virtualNetwork
Associate the subnet to the virtual network
You can write the subnet configuration to the virtual network with Set-AzVirtualNetwork. This command creates the subnet:
$virtualNetwork | Set-AzVirtualNetwork
It is important to always verify that the Vnet works as intended and so to do so, why don’t we create two VMs in our vNet to test?
Let’s go ahead to create VM #1
Create the VM #1
Create the first VM with New-AzVM. When you run the next command, you’re prompted for credentials. Enter a user name and password for the VM:
New-AzVm `
    -ResourceGroupName "encResourceGroup" `
    -Location "East US" `
    -VirtualNetworkName "encVirtualNetwork" `
    -SubnetName "default" `
    -Name "encVm1" `
    -AsJob
I know you are wondering about the AsJob parameter so let me explain;
The -AsJob option creates the VM in the background. You can continue to the next step.
When Azure starts creating the VM in the background, you’ll get something like this back:
Id     Name            PSJobTypeName   State         HasMoreData     Location             Command
--     ----            -------------   -----         -----------     --------             -------
1      Long Running... AzureLongRun... Running       True            localhost            New-AzVM
Let’s go ahead to create VM #2
Create the VM #2
Create the second VM with this command:
New-AzVm `
  -ResourceGroupName "encResourceGroup" `
  -VirtualNetworkName "encVirtualNetwork" `
  -SubnetName "default" `
  -Name "encVm2"
You’ll have to create another user and password. Azure takes a few minutes to create the VM.
Connect to a VM from the internet
Use Get-AzPublicIpAddress to return the public IP address of a VM. This example returns the public IP address of the encVm1 VM:
Get-AzPublicIpAddress `
  -Name encVm1 `
  -ResourceGroupName encResourceGroup `
  | Select IpAddress
Open a command prompt on your local computer. Run the mstsc command. Replace
mstsc /v:
- If prompted, select Connect.
- Enter the user name and password you specified when creating the VM.
- Select OK.
- You may receive a certificate warning. If you do, select Yes or Continue.
Communicate between VMs
- In the Remote Desktop of encVm1, open PowerShell.
- Enter ping encVm2.
You’ll get something like this back:
PS C:\Users\encVm1> ping encVm2

Pinging encVm2.resourceelocatedinthecloud.domain.net
Request timed out.
Request timed out.
Request timed out.
Request timed out.

Ping statistics for 10.10.10.5:
    Packets: Sent = 4, Received = 0, Lost = 4 (100% loss),
But what do I do when the pings fail?
The ping fails, because it uses the Internet Control Message Protocol (ICMP). By default, ICMP isn’t allowed through your Windows firewall.
New-NetFirewallRule –DisplayName “Allow ICMPv4-In” –Protocol ICMPv4
That command lets ICMP inbound through the Windows firewall.
You’ll get something like this back:
C:\windows\system32>ping encVm1

Pinging encVm1.resourceelocatedinthecloud.domain.net [10.10.10.4] with 32 bytes of data:
Reply from 10.10.10.4: bytes=32 time=2ms TTL=128
Reply from 10.10.10.4: bytes=32 time<1ms TTL=128
Reply from 10.10.10.4: bytes=32 time<1ms TTL=128
Reply from 10.10.10.4: bytes=32 time<1ms TTL=128

Ping statistics for 10.10.10.4:
    Packets: Sent = 4, Received = 4, Lost = 0 (0% loss),
Approximate round trip times in milli-seconds:
    Minimum = 0ms, Maximum = 2ms, Average = 0ms
You receive replies from encVm1, because you allowed ICMP through the Windows firewall on the encVm1 VM in a previous step.
Clean up resources
When you're done with the virtual network and the VMs, use Remove-AzResourceGroup to remove the resource group and all the resources it has:
Remove-AzResourceGroup -Name encResourceGroup -Force
Understanding Azure Networking Step by Step - VNet peering
What is VNet peering?
VNet peering (or virtual network peering) enables you to connect virtual networks. A VNet peering connection between virtual networks enables you to route traffic between them privately through IPv4 addresses. Virtual machines in the peered VNets can communicate with each other as if they are within the same network. These virtual networks can be in the same region or in different regions (also known as Global VNet Peering). VNet peering connections can also be created across Azure subscriptions. To earn more on this subject go to Microsoft Azure's Article on virtual network peering.
Connect your enterprise router to the Internet: Follow article on how to configure Cisco 800 series for Internet
